

Upload files to your own S3, R2 or B2 bucket from the terminal through the Aktar app, and get the link.
- ✓Open-source license (MIT)
- ✓Actively maintained (<30d)
- ✓Clear description
- ✓Documented (README)
git clone https://github.com/getaktar/cliTools overview
<p align="center">
<img src="https://raw.githubusercontent.com/getaktar/cli/main/docs/logo.png" alt="Aktar" width="96" height="96">
</p>
<h1 align="center">Aktar CLI</h1>
<p align="center">
Upload files to your own S3, Cloudflare R2 or Backblaze B2 bucket from the terminal, and get the link.
</p>
<p align="center">
<a href="https://www.npmjs.com/package/@getaktar/cli"><img src="https://img.shields.io/npm/v/@getaktar/cli?color=125efe" alt="npm version"></a>
<a href="https://github.com/getaktar/cli/actions/workflows/ci.yml"><img src="https://github.com/getaktar/cli/actions/workflows/ci.yml/badge.svg" alt="CI"></a>
<a href="https://github.com/getaktar/cli/blob/main/LICENSE"><img src="https://img.shields.io/npm/l/@getaktar/cli?color=125efe" alt="MIT license"></a>
</p>
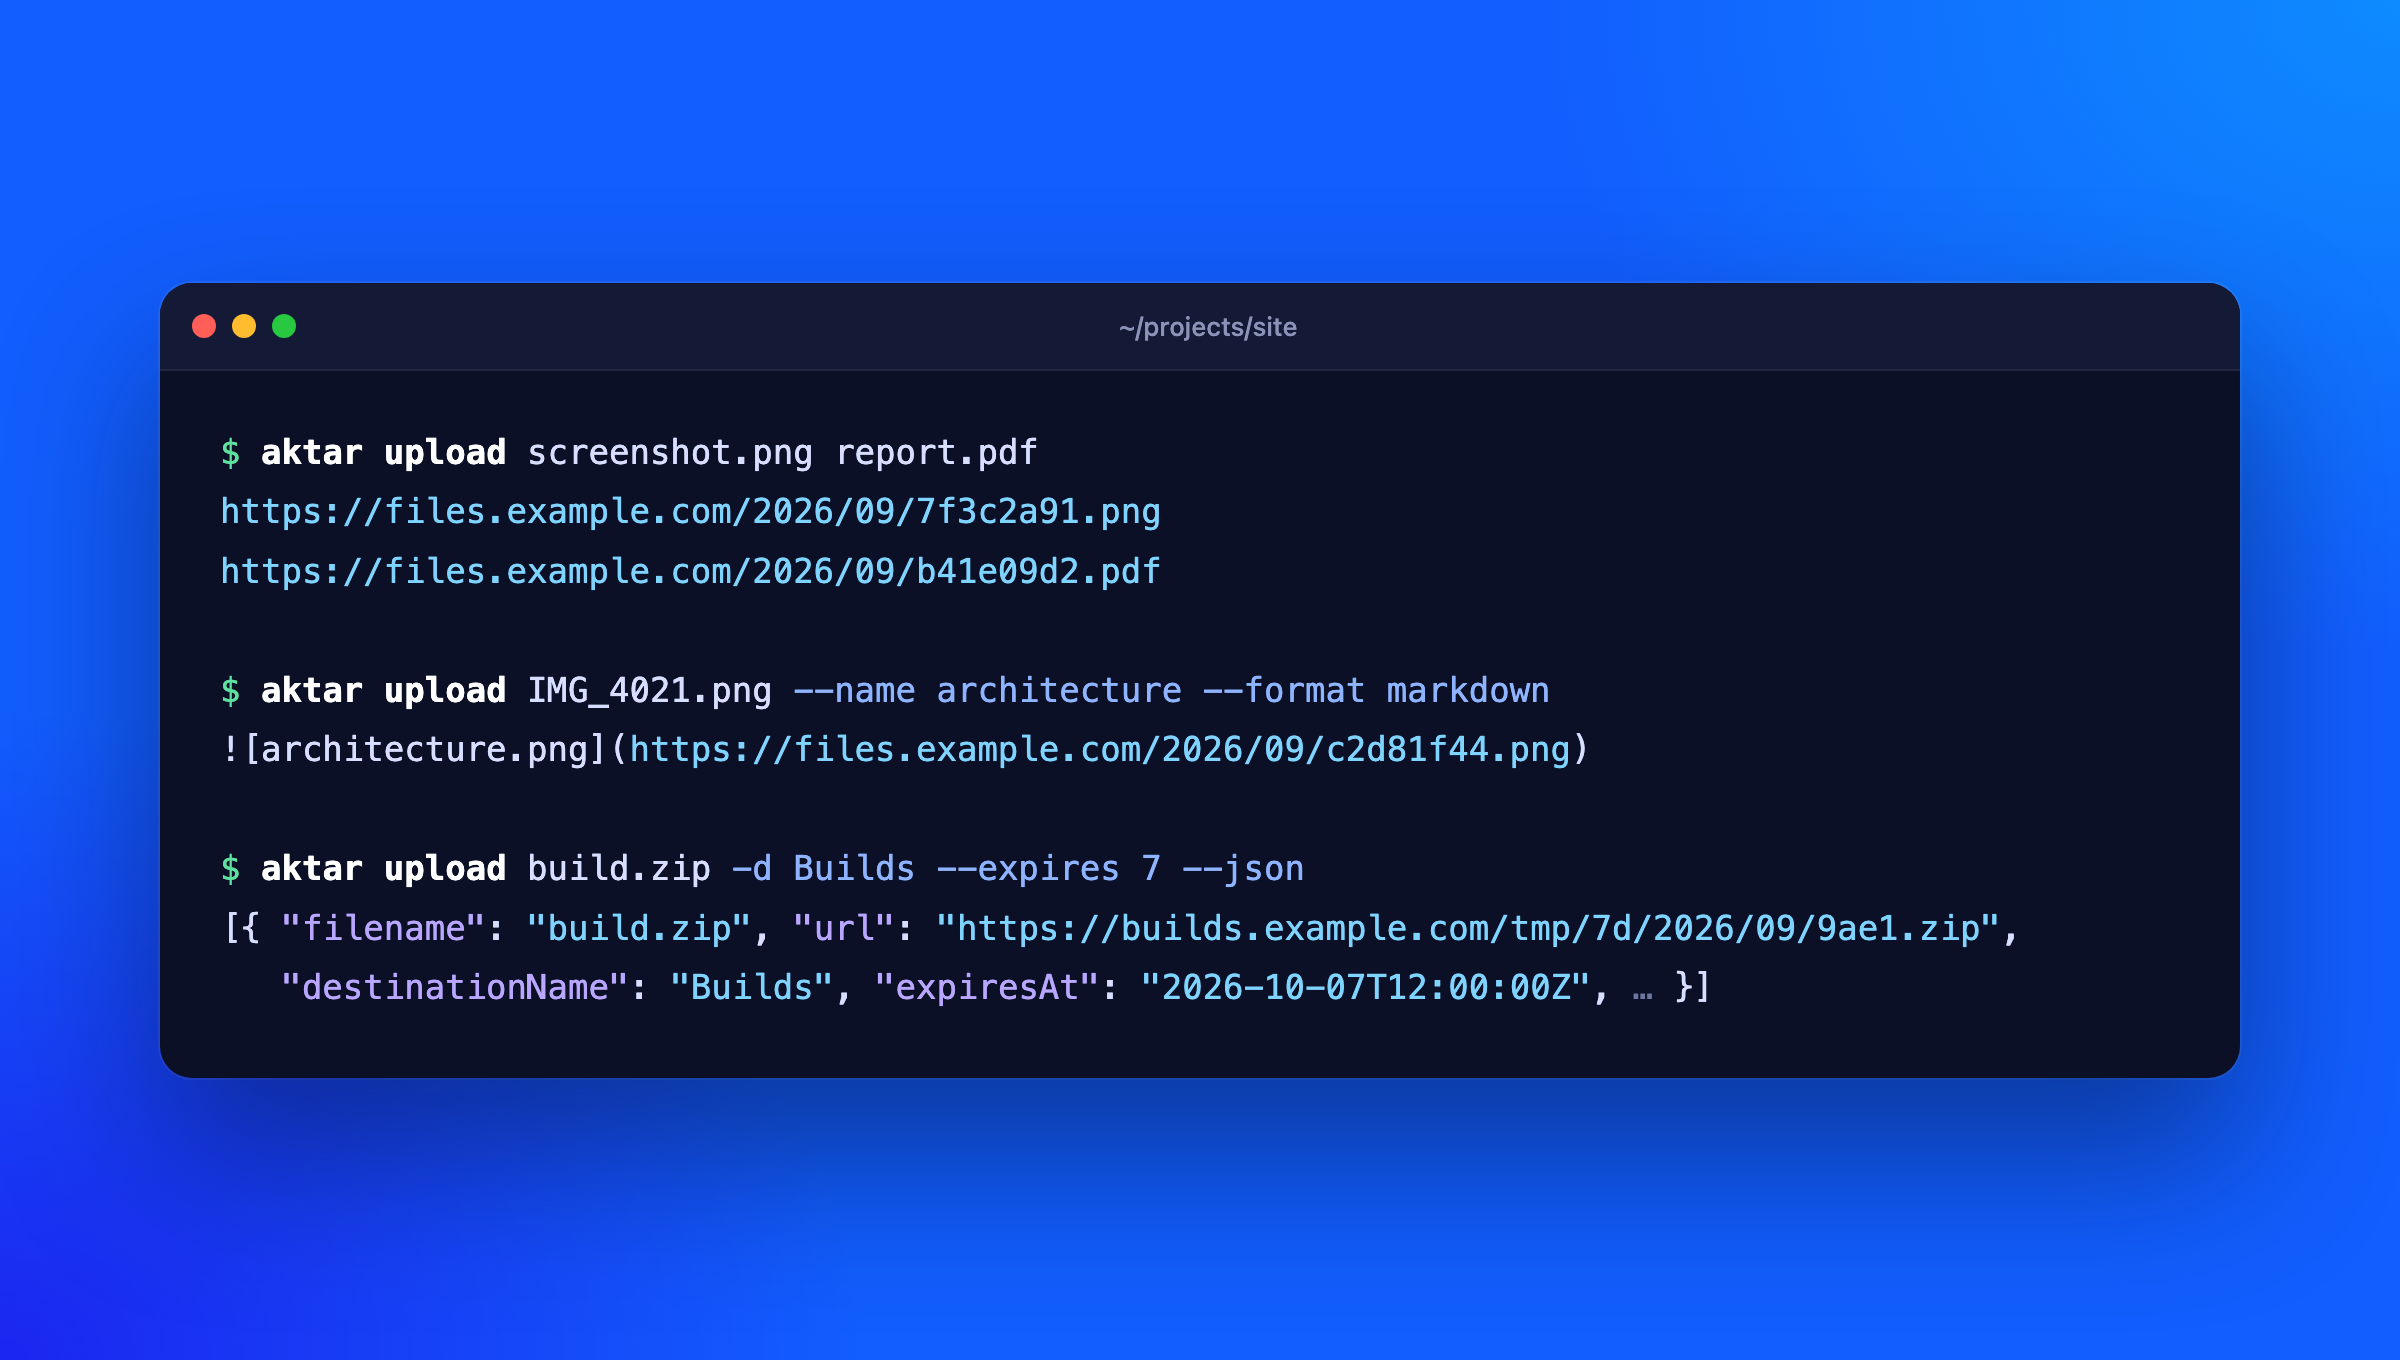
The `aktar` command talks to the [Aktar](https://getaktar.com) app on your Mac or Windows PC, so it uses the destinations, keys, path templates and link settings you already set up there. Your storage keys never leave the app.
```bash
$ aktar upload screenshot.png
https://files.example.com/2026/09/7f3c2a91.png
```
## Install
```bash
npm install -g @getaktar/cli
# or
brew install getaktar/tap/aktar-cli
```
Or run it without installing: `npx @getaktar/cli upload file.png`.
Requires Node.js 18 or later and Aktar for Mac 0.4.0 or later, or Aktar for Windows.
## Connect to Aktar
1. In Aktar, open **Settings > Integrations** and turn on **Allow local connections**.
2. Copy the token shown there.
3. Run:
```bash
aktar login
```
and paste the token when asked. It's checked against Aktar and saved to `~/.config/aktar/cli.json` (`%APPDATA%\aktar\cli.json` on Windows), readable only by you. You can also pipe it in (`pbpaste | aktar login`) or set `AKTAR_TOKEN` (and `AKTAR_PORT` if you changed the port) instead.
## Usage
```bash
aktar upload report.pdf # prints the link
aktar upload *.png -f markdown # one Markdown image per file
aktar upload build.zip -d Builds # pick a destination by name or ID
aktar upload notes.txt --folder docs/2026 # keep the name, upload into a folder
aktar upload IMG_4021.jpg --name cover # upload as cover.jpg
aktar upload log.txt --expires 7 # delete after 7 days
aktar upload --clipboard # the file or image on the clipboard
aktar upload demo.mp4 --qr # the link and a QR code to open it on your phone
aktar upload photo.jpg --json # full details as JSON
aktar status # which Aktar and destination you're connected to
aktar destinations # list destinations (* marks the selected one)
aktar history invoice -n 5 # search recent uploads
aktar replace 0B6C2F8E-3D1A-4C55-9E2B-7A41D0C3E9F1 v2.png # new file, same link
aktar replace docs/guide.pdf guide.pdf -d Docs # replace a key in a destination's bucket
aktar qr https://example.com # a QR code of any link or text
aktar qr 0B6C2F8E-3D1A-4C55-9E2B-7A41D0C3E9F1 # a QR code of an upload in history
```
Without `-d`, files go to the destination selected in Aktar's menu bar. Uploads show up in Aktar's history like any other.
`--format` chooses what's printed: `url` (default), `markdown`, `html`, or `custom` (your template from Aktar). `--expires` takes 1, 7, 14 or 30 days and needs Aktar's auto-delete rules on that destination; without it, files are kept.
`--name` uploads a single file under another name: it's what `{filename}` and `{ext}` in the destination's path template become, and what Aktar's history shows. If the name has no extension, the file's own is added (`--name cover` uploads `IMG_4021.jpg` as `cover.jpg`); if it has one, it's used as given. With `--folder`, it's the name inside the folder.
If the same file (same contents, destination and expiry) is already in the bucket, Aktar doesn't upload it again and gives you the existing link. `aktar` prints the link as usual and notes it on stderr (`aktar: photo.jpg: already uploaded, reused the existing link`), so scripts reading stdout still get one link per file. This needs Aktar for Mac 0.10.0 or Windows 0.3.0.
### QR codes
`aktar upload --qr` prints a QR code under each link, so you can open it on your phone. The QR code is always of the link itself, whatever `--format` prints. It's drawn black on white in the terminal, whatever its theme; when the output isn't a terminal, or `NO_COLOR` is set, it's drawn without colors (light modules as blocks), which phone cameras read on a light or dark background. `--qr` can't be combined with `--json`.
`aktar qr <text>` shows the QR code of any link or text; quote text with spaces. Given an upload ID from `aktar history --json`, it shows that upload's link and its QR code. `--png <file>` saves the QR code as a PNG instead:
```bash
aktar qr https://files.example.com/2026/09/7f3c2a91.png --png link.png
```
### What Aktar does for you
The app does the work per destination, so the CLI needs nothing extra for it:
- Converting images to WebP or AVIF, if the destination is set to
- `{md5}` and `{sha256}` in path templates, to name files by their contents
- Big files: past 5 GB, Aktar uploads in parts and resumes after a dropped connection. `aktar` streams the file to the app, so its size doesn't matter
The link `aktar` prints is the one for the file as stored, after any conversion.
### JSON output
`aktar upload --json` prints an array with one entry per uploaded file:
```json
[
{
"id": "0B6C…",
"filename": "photo.jpg",
"objectKey": "2026/09/7f3c2a91.jpg",
"url": "https://files.example.com/2026/09/7f3c2a91.jpg",
"destinationId": "5D1A…",
"destinationName": "Screenshots",
"mimeType": "image/jpeg",
"size": 482113,
"createdAt": "2026-09-30T12:00:00Z",
"expiresAt": null,
"formats": { "url": "…", "markdown": "…", "html": "…", "custom": "…" },
"reused": false
}
]
```
`reused` is `true` when nothing was uploaded because the file was already there; older versions of Aktar leave it out.
### Exit codes
| Code | Meaning |
|---|---|
| 0 | Everything worked |
| 1 | At least one upload or request failed (the others still went through) |
| 2 | Bad arguments, or a file that doesn't exist (nothing was uploaded) |
| 3 | Not logged in, Aktar isn't running, its local API is off, or the token is wrong |
## AI agents (MCP and skill)
### MCP server
`aktar mcp` runs a [Model Context Protocol](https://modelcontextprotocol.io) server, so Claude, Cursor, VS Code, Codex and other agents can upload through Aktar, find past uploads and make links. Connect Aktar first (`aktar login`), then add it to your agent:
```bash
claude mcp add aktar -- aktar mcp # Claude Code
codex mcp add aktar -- aktar mcp # Codex
```
For Claude Desktop, Cursor, VS Code and others that take a JSON config:
```json
{
"mcpServers": {
"aktar": { "command": "aktar", "args": ["mcp"] }
}
}
```
Without a global install, use `"command": "npx", "args": ["-y", "@getaktar/cli", "mcp"]`.
| Tool | What it does |
|---|---|
| `upload_file` | Upload a file (destination, name, folder, expiry optional) and return its link, Markdown and HTML |
| `upload_clipboard` | Upload what's on the clipboard |
| `replace_file` | Write a new file over an upload, keeping its link (Mac 0.14.0 / Windows 0.7.0) |
| `search_uploads` | Search upload history |
| `list_destinations` | Destinations and what file types each is used for |
| `list_bucket` | Browse a bucket's folders and files |
| `create_temporary_link` | A link that stops working after a while (presigned URL) |
| `get_thumbnail` | A preview image of an upload (Mac 0.13.0 / Windows 0.6.0) |
| `list_watched_folders` | Watched folders and their status |
| `get_status` | Check the connection |
| `delete_upload` | Delete an upload from its bucket (only with `--allow-delete`) |
Uploading publishes a file, so keep an eye on what your agent sends. Your agent asks before calling a tool unless you allow it, and these options narrow what the server can do:
- `--root <folder>`: only upload files from this folder (repeat for more). Paths are resolved, symlinks included, before they're checked.
- `--read-only`: only the tools that change nothing (search, list, links, thumbnails).
- `--allow-delete`: also offer `delete_upload`, which is left out by default.
```bash
claude mcp add aktar -- aktar mcp --root ~/Projects --root ~/Desktop
```
The server speaks both the current per-request protocol (2026-07-28) and the earlier `initialize` versions (2024-11-05 to 2025-11-25).
### Agent skill
Agents that use [skills](https://agentskills.io) but not MCP can use the CLI directly. `aktar skill` prints a `SKILL.md` that teaches them how:
```bash
mkdir -p ~/.claude/skills/aktar && aktar skill > ~/.claude/skills/aktar/SKILL.md
```
## Typora
In Typora, open **Settings > Image > Image Upload**, choose **Custom Command** and enter:
```
aktar upload
```
Typora passes the image paths and reads one link per line. Click **Test Uploader** to check it.
## Links
- Website: https://getaktar.com/cli/
- Aktar for Mac and Windows: https://getaktar.com
- Homebrew: `brew install getaktar/tap/aktar-cli`
## License
MIT
What people ask about cli
What is getaktar/cli?
+
getaktar/cli is tools for the Claude AI ecosystem. Upload files to your own S3, R2 or B2 bucket from the terminal through the Aktar app, and get the link. It has 1 GitHub stars and its last recorded update is dated 2026-10-05.
How do I install cli?
+
You can install cli by cloning the repository (https://github.com/getaktar/cli) or following the README instructions on GitHub. ClaudeWave also provides quick install blocks on this page.
Is getaktar/cli safe to use?
+
Our security agent has analyzed getaktar/cli and assigned a Trust Score of 87/100 (tier: Trusted). See the full breakdown of passed checks and flags on this page.
Who maintains getaktar/cli?
+
getaktar/cli is maintained by getaktar. The last recorded GitHub activity is dated 2026-10-05, with 0 open issues.
Are there alternatives to cli?
+
Yes. On ClaudeWave you can browse similar tools at /categories/tools, sorted by popularity or recent activity.
Deploy cli to your cloud
Ship this repo to production in minutes. Each platform spins up its own environment with editable env vars.
Maintain this repo? Add a badge to your README
Drop the badge into your GitHub README to show it's tracked on ClaudeWave. Each badge links back to this page and reflects the live Trust Score.
[](https://claudewave.com/repo/getaktar-cli)<a href="https://claudewave.com/repo/getaktar-cli"><img src="https://claudewave.com/api/badge/getaktar-cli" alt="Featured on ClaudeWave: getaktar/cli" width="320" height="64" /></a>More Tools

A single CLAUDE.md file to improve Claude Code behavior, derived from Andrej Karpathy's observations on LLM coding pitfalls.

An AI skill that provides design intelligence for building professional UI/UX across multiple platforms.

🪨 why use many token when few token do trick. Viral skill + proxy for coding agents that cuts 65% of tokens by talking like a caveman.

CLI proxy that reduces LLM token consumption by 60-90% on common dev commands. Single Rust binary, zero dependencies

The fastest, litest AI Gateway. Rust core with Python SDK. Call 100+ LLM APIs in OpenAI (or native) format with cost tracking, guardrails, load balancing, and logging [Bedrock, Azure, OpenAI, Anthropic, OpenAI, VertexAI, vLLM, Nvidia NIM]

Use Claude Code, Codex, VSCode, Pi, and OpenCode (and 6 other harnesses) for free (1.3B+ free tokens) from your terminal, app, IDE, or phone, and now from the browser with native browser sessions (multi-harness + multi-model) like OpenClaw (voice supported + ToS friendly)